
Backpackinglight · Guide
How to pack your backpack – lighter, smarter and more efficiently
A well-packed backpack feels stable and makes it easier to reach what you need. Start with the centre of gravity and moisture protection, then organise the pack.
The zones below are a starting point. Adapt them to your backpack's design and what you actually need during the day.
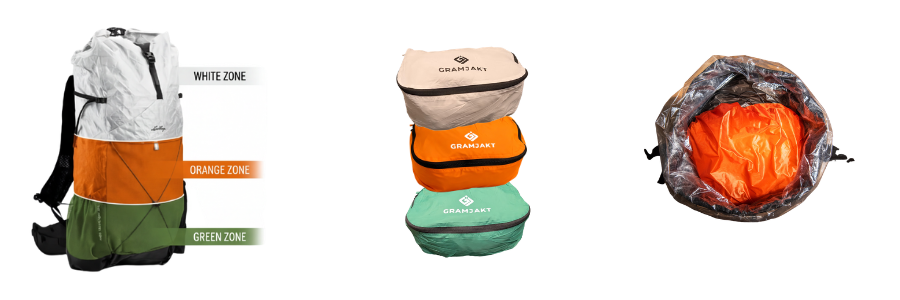
1. Bottom – soft and dry
A sleeping bag or quilt and clothes you do not need during the day can fill the bottom. Protect them in a watertight liner or suitable waterproof bags. Avoid hard items pressing against your back.
2. Middle – heavier items close to your back
Place the densest and heaviest part of your load close to your back so the pack feels balanced. The food bag often accounts for a large share of the weight after resupply. The exact position needs adjusting to suit the load and suspension system.
Keep a wet tent separate from sleeping gear and dry clothing. An external pocket or secure external attachment can work if you protect the tent from coming loose or being damaged. Store poles so they do not protrude unprotected.
3. Top and pockets – quick access
- Rainwear and extra insulating layers.
- Map, navigation equipment and what you need during a break.
- Snacks, water and water treatment.
- First aid and relevant hygiene items.
- A headlamp when the trip's conditions require one.
Do not put all the heavy items at the top just because they are easy to reach there. Distribute the load and use the pockets without making the pack pull sideways or backwards.
4. Protect the contents from water
Water-repellent fabric does not automatically make a backpack watertight. Seams, openings and closures can let water in. A liner needs to be intact and closed correctly; ordinary organiser bags and packing pods should not be considered waterproof unless they are designed to be.
Stuff sacks help you stay organised. However, protection for sleeping gear and dry clothing must work even in prolonged rain. Decide whether you need a liner, separate watertight bags and possibly a rain cover based on your own pack.
5. Adjust as your food supply shrinks
Use compression straps to keep the contents together. Fill gaps with soft clothing and check that nothing hard presses against your back. In a frameless pack, a suitable sleeping pad can provide shape, but it does not replace the load-carrying capability of every frame.
Checks before you set off
- Walk for a while with the fully packed backpack.
- Check whether the centre of gravity pulls backwards or sideways.
- Check that important items are accessible.
- Practise closing the liner and keeping wet and dry items separate.
- Adjust again after the first resupply or when the food bag has become smaller.
About this guide
The previous guide's zone illustration and basic advice have been retained in revised form. Claims that all pods or liners provide watertight protection, or that a rain cover can always be left behind, have been replaced with checks of the actual equipment. No product weights, stock information or new product promises have been added.